How to add a network to Metamask?
The procedure for adding a blockchain to Metamask is the same for all blockchains.
 DeFi
DeFi 2023-01-06
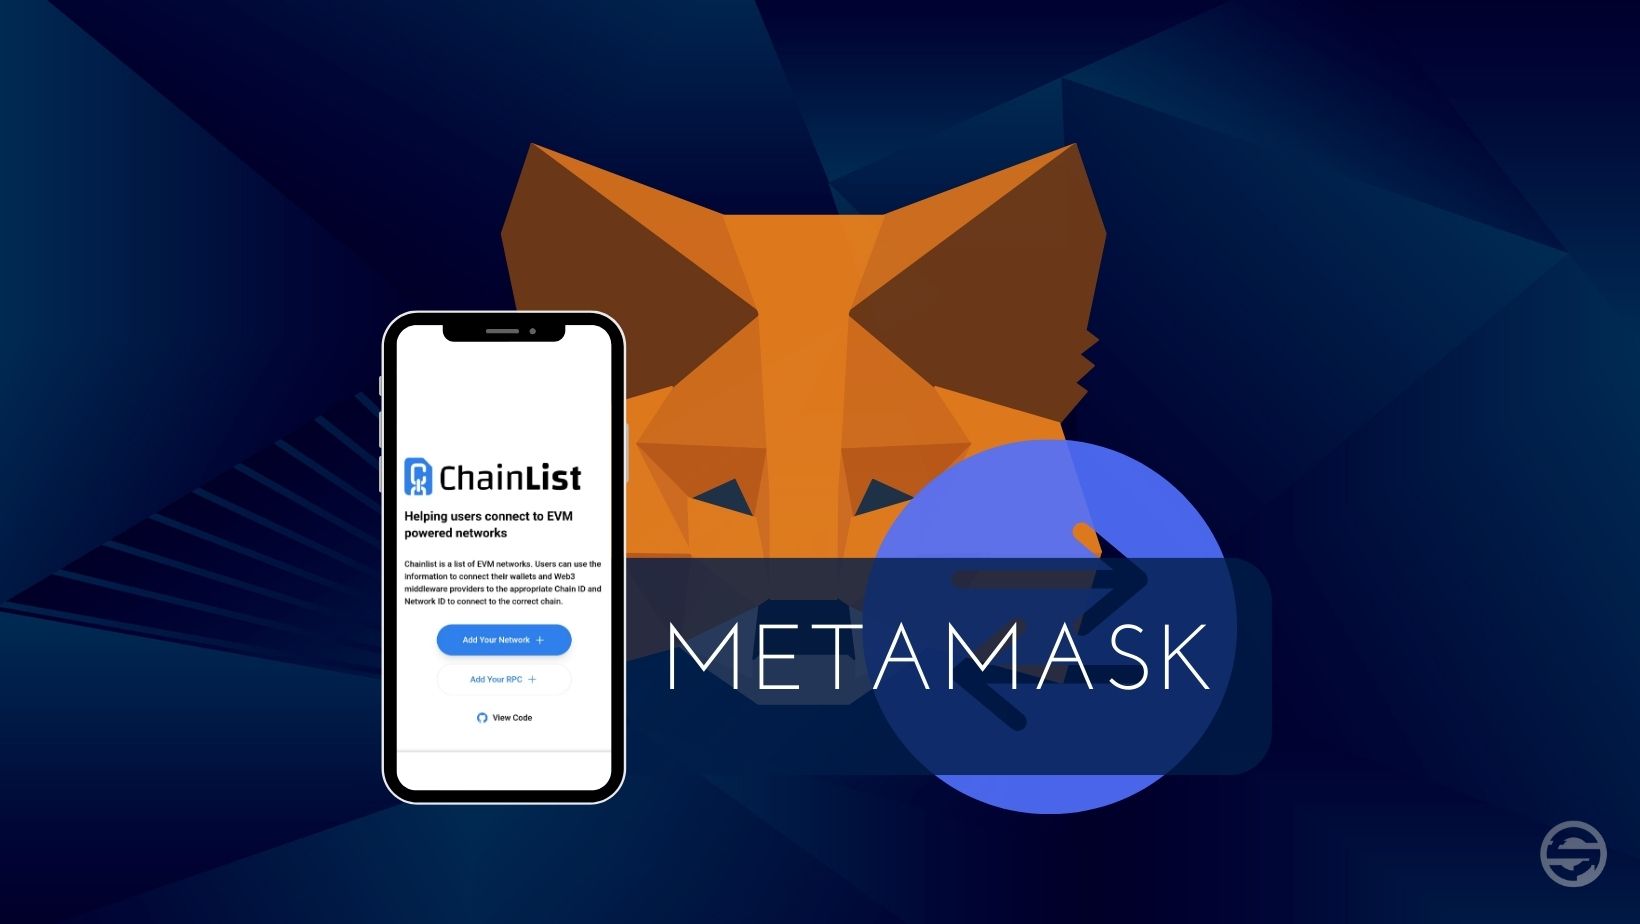
Table of contents
Metamask, what is it?
This is a wallet created to interact with the blockchain Ethereum. In the form of a browser extension or mobile application, Metamask allows its users to host cryptocurrencies, to send or receive them and to convert cryptocurrencies into other cryptocurrencies. This wallet more generally makes it possible to interact with decentralized applications. Metamask was initially developed to interact with the Ethereum blockchain, but it also allows interaction with other blockchains such as Binance Smart Chain, Avalanche, Polygon and many others.
Every interaction on the blockchain requires a fee. These fees must be paid with the native token of the blockchain used. For example, using the avalanche blockchain requires AVAXes.
Add a network
The procedure for adding a blockchain on Metamask is the same for all blockchains. For this example, we are going to add a new network on Metamask which will allow us to interact with the Avalanche blockchain.
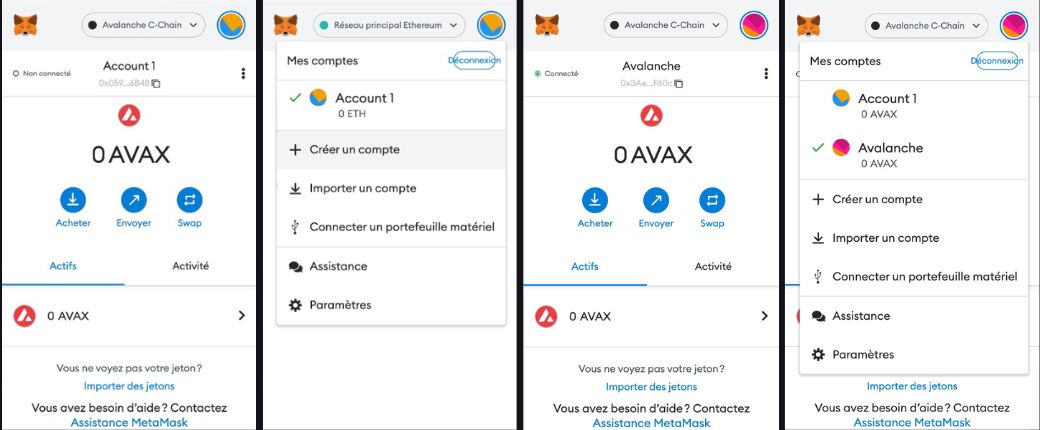
Note that Metamask offers the possibility to create multiple accounts in your wallet. It is recommended to dissociate the accounts according to the blockchains used. If you add several blockchains to the same account, you run the risk of using the wrong blockchain when transferring cryptocurrencies, for example.
Create an account
1. Click on the blue circle at the top right
2. Click "Create Account"
3. Give your new account a name, for example, Avalanche. Then click "Create"
4. Your new account is created. You can switch from one to the other.
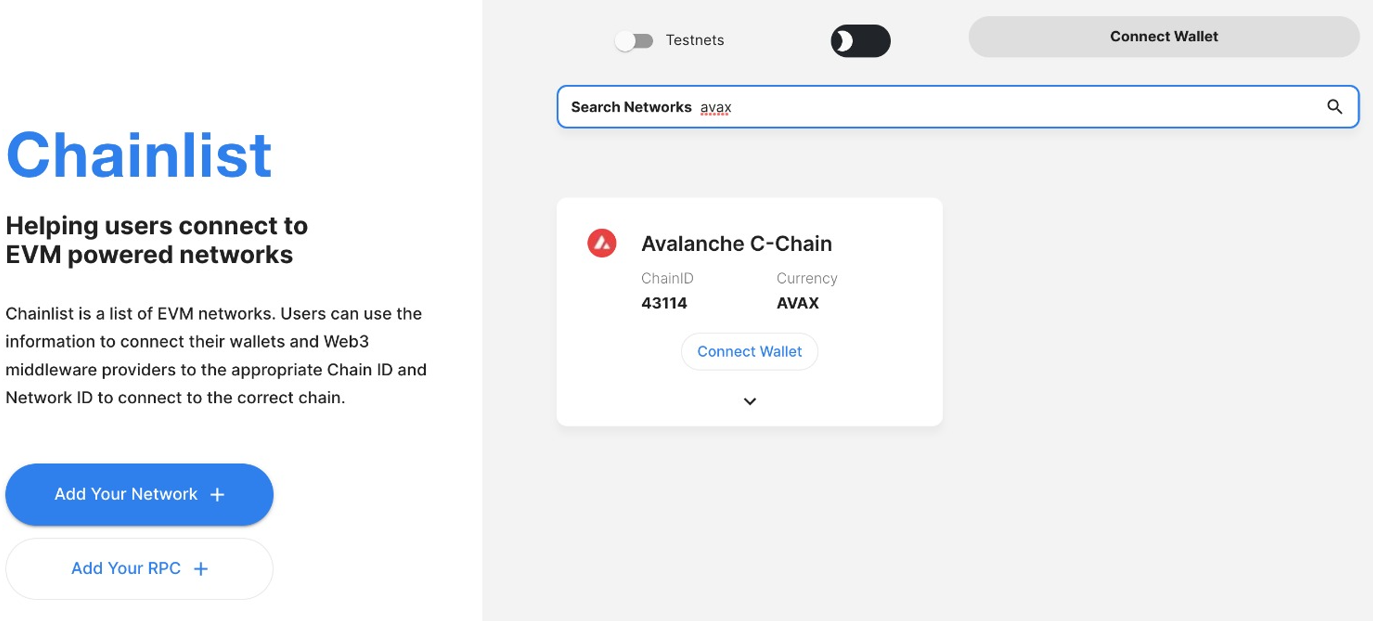
Add a network with Chainlist
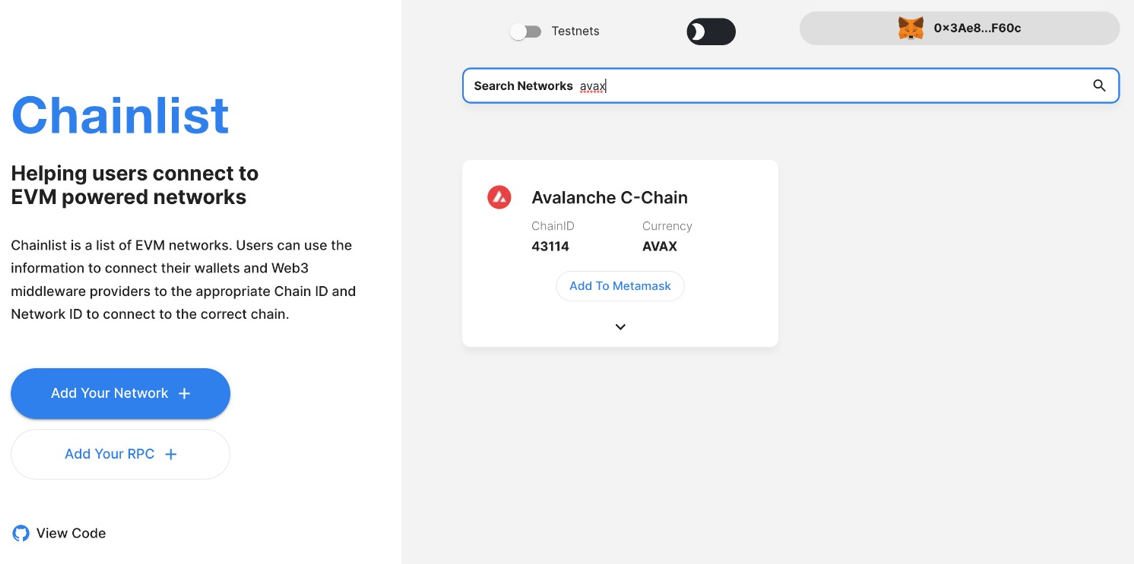
To add a new network on Metamask, go to site https://chainlist.org/
Before going any further, feel free to add chainlist in your favorites. You may need it to add another network (Polygon, Arbitrum, BSC, etc.) to your Metamask. Fraud being frequent in decentralized finance, you will be sure to always be on the official site.
In the search bar, enter "avax" or "avalanche"
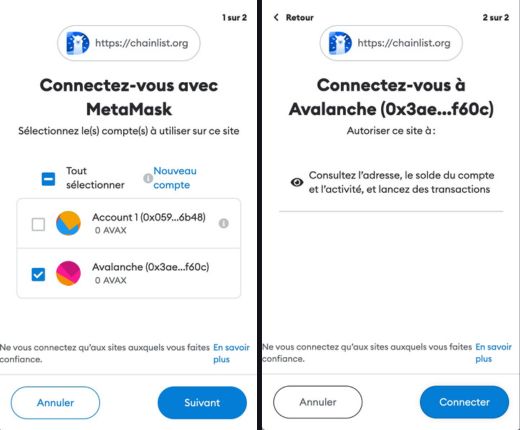
First, you will have to connect your wallet to Chainlist, click on "Connect Wallet" either at the top right or in the center of the screen.
1.Your Metamask extension will open a first window. To proceed with the connection, make sure you are connecting the correct account and click "Next".
2. A second window appears. To finalize the connection, click on "Connect".
- Once logged in to Chainlist, you will see your public address appear at the top right of the screen. You can now click on "Add To Metamask" in the center of the screen.
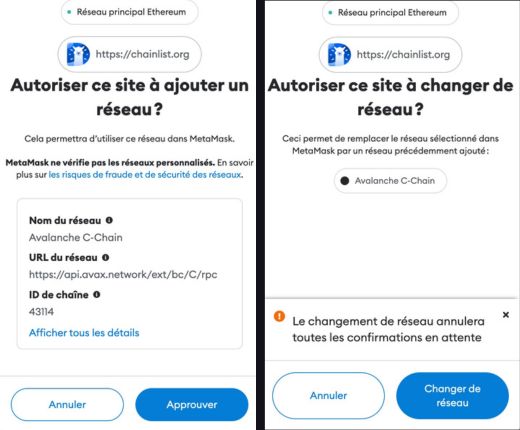
1. A first window appears. Chainlist wants to add the data needed to use the new network on Metamask. Click "Approve".
2. A second window will ask you if Chainlist can change the current network to the Avalanche C-Chain network. Click on "Change network".
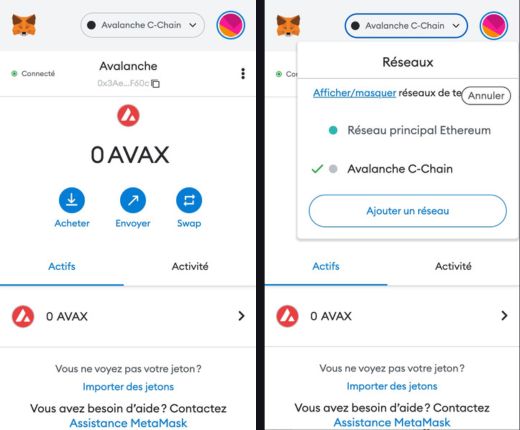
Congratulations!
The new network allowing access to decentralized applications developed on Avalanche has been added to your Metamask. Remember that to interact with BC avalanche it requires AVAX in order to pay the fees to process transactions on the blockchain.
If you want to return to decentralized Ethereum blockchain applications, remember to switch networks. To do this, click on the drop-down list to the right of the fox head and select the correct network, Ethereum in this case.
Disclaimer : This is not financial advice. The purpose of the site is to inform readers. Any type of investment involves risk. Do your due diligence and do your own research on the projects featured on the site. Act as a good father and do not invest more than your objectives or financial means allow you. In this regard, read our page: Warning about virtual currencies.
Some articles on the site contain affiliate links, and using them to register from the site allows the development of the site by collecting commissions. By doing so, you also make yourself eligible for a welcome bonus such as a voucher or fee reduction, for example.